设计模式-观察者模式
观察者模式
观察者模式的应用场景
观察者模式(Observer Pattern)定义了对象之间的一对多依赖,让多个观察者对象同时监听一个主体对象,当主体对象发生变化时,它的所有依赖者(观察者)都会收到通知并更新,属于行为型模式。观察者模式有时也叫做发布订阅模式。观察者模式主要用于在关联行为之间建立一套触发机制的场景。观察者模式在现实生活应用也非常广泛,比如:微信朋友圈动态通知、GPer 生态圈消息通知、邮件通知、广播通知、桌面程序的事件响应等(如下图)。

现在大家都用过我们的 GPer 生态圈了,当小伙伴们在 GPer 生态圈中提问的时候,如果有设置指定老师回答,对应的老师就会收到邮件通知,这就是观察者模式的一种应用场景。我们有些小伙伴可能会想到 MQ,异步队列等,其实 JDK 本身就提供这样的 API。
我们用代码来还原一下这样一个应用场景,创建 GPer 类:
package com.gupaoedu.vip.pattern.observer.gperadvice;
import java.util.Observable;
/**
* JDK提供的一种观察者的实现方式,被观察者
*/
public class GPer extends Observable{
    private String name = "GPer生态圈";
    private static GPer gper = null;

    private GPer(){}
    public static GPer getInstance(){
        if(null == gper){
            gper = new GPer();
        }
        return gper;
    }
    public String getName() {
        return name;
    }
    public void publishQuestion(Question question){
        System.out.println(question.getUserName() + "在" + this.name + "上提交了一个问题。");
        setChanged();
        notifyObservers(question);
    }
}
创建问题 Question 类:
package com.gupaoedu.vip.pattern.observer.gperadvice;

public class Question {
    private String userName;

    private String content;
    public String getUserName() {
        return userName;
    }
    public void setUserName(String userName) {
        this.userName = userName;
    }
    public String getContent() {
        return content;
    }
    public void setContent(String content) {
        this.content = content;
    }
}
创建老师 Teacher 类:
package com.gupaoedu.vip.pattern.observer.gperadvice;
import java.util.Observable;
import java.util.Observer;

public class Teacher implements Observer {
    private String name;
    public Teacher(String name){
        this.name = name;
    }
    public void update(Observable o, Object arg) {
        GPer gper = (GPer)o;
        Question question = (Question)arg;
        System.out.println("===============================");
        System.out.println(name + "老师,你好!n" + "您收到了一个来自"" + gper.getName() + ""的提问,希望您解答,问题内容如下:n" + question.getContent() + "n" + "提问者:" + question.getUserName());
    }
}
客户端测试代码:
package com.gupaoedu.vip.pattern.observer.gperadvice;

public class ObserverTest {
    public static void main(String[] args) {
        GPer gper = GPer.getInstance();
        Teacher tom = new Teacher("Tom");
        Teacher mic = new Teacher("Mic");
        gper.addObserver(tom);
        gper.addObserver(mic);
        //业务逻辑代码
        Question question = new Question();
        question.setUserName("小明");
        question.setContent("观察者模式适用于哪些场景?");
        gper.publishQuestion(gper,question);
    }
}
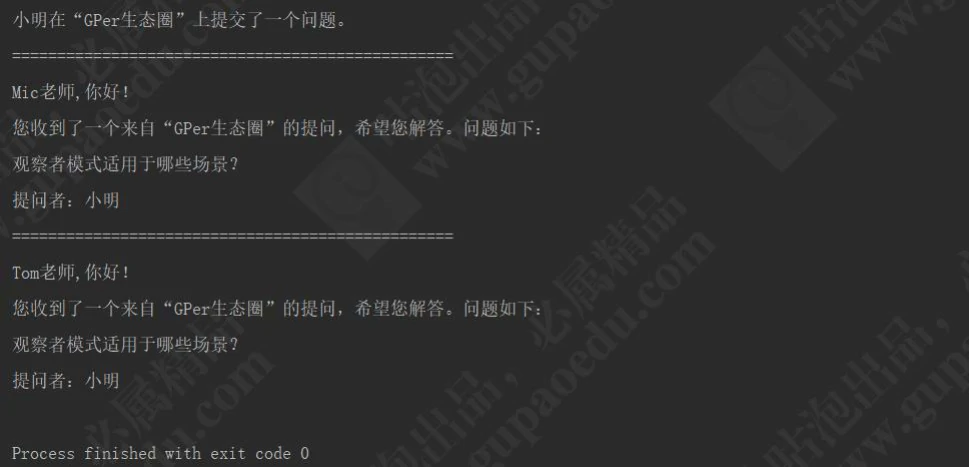
运行结果:
在下面我们再来设计一个业务场景,帮助小伙伴更好的理解观察者模式。JDK 源码中,观察者模式也应用非常多。例如 java.awt.Event 就是观察者模式的一种,只不过 Java 很少被用来写桌面程序。我们自己用代码来实现一下,以帮助小伙伴们更深刻地了解观察者模式的实现原理。
首先,创建 Event 类:
package com.gupaoedu.vip.pattern.observer.events.core;
import java.lang.reflect.Method;
/**
*监听器的一种包装,标准事件源格式的定义
*/
public class Event {
    //事件源,事件是由谁发起的保存起来
    private Object source;
    //事件触发,要通知谁
    private Object target;
    //事件触发,要做什么动作,回调
    private Method callback;
    //事件的名称,触发的是什么事件
    private String trigger;
    //事件触发的时间
    private long time;
    public Event(Object target, Method callback) {
        this.target = target;
        this.callback = callback;
    }
    public Event setSource(Object source) {
        this.source = source;
        return this;
    }
    public Event setTime(long time) {
        this.time = time;
        return this;
    }
    public Object getSource() {
        return source;
    }
    public Event setTrigger(String trigger) {
        this.trigger = trigger;
        return this;
    }
    public long getTime() {
        return time;
    }
    public Object getTarget() {
        return target;
    }
    public Method getCallback() {
        return callback;
    }
    @Override
    public String toString() {
        return "Event{" + "\n" +
            "tsource=" + source.getClass() + ",\n" +
            "ttarget=" + target.getClass() + ",\n" +
            "tcallback=" + callback + ",\n" +
            "ttrigger='" + trigger + "',\n" +
            "ttime=" + time + "'n" +
            '}';
    }
}
创建 EventLisenter 类:
package com.gupaoedu.vip.pattern.observer.events.core;
import java.lang.reflect.Method;
import java.util.HashMap;
import java.util.Map;
/**
*监听器,它就是观察者的桥梁
*/
public class EventLisenter {
    //JDK底层的 Lisenter通常也是这样来设计的
    protected Map<String,Event> events = new HashMap<String,Event>();
    //事件名称和一个目标对象来触发事件
    public void addLisenter(String eventType,Object target){
        try {
            this.addLisenter(eventType, target, target.getClass().getMethod("on" + toUpperFirstCase(eventType),Event.class));
        }catch (Exception e){
            e.printStackTrace();
        }
    }
    public void addLisenter(String eventType,Object target,Method callback){
        //注册事件
        events.put(eventType, new Event(target, callback));
    }
    //触发,只要有动作就触发
    private void trigger(Event event) {
        event.setSource(this);
        event.setTime(System.currentTimeMillis());
        try {
            //发起回调
            if(event.getCallback() != null){
                //用反射调用它的回调函数
                event.getCallback().invoke(event.getTarget(),event);
            }
        } catch (Exception e) {
            e.printStackTrace();
        }
    }
    //事件名称触发
    protected void trigger(String trigger){
        if(!this.events.containsKey(trigger)){
            return;
        }
        trigger(this.events.get(trigger).setTrigger(trigger));
    }
    //逻辑处理的私有方法,首字母大写
    private String toUpperFirstCase(String str){
        char[] chars = str.toCharArray();
        chars[0] -= 32;
        return String.valueOf(chars);
    }
}
创建 MouseEventType 接口:
package com.gupaoedu.vip.pattern.observer.events.mouseevent;

public interface MouseEventType {
    //单击
    String ON_CLICK = "click";
    //双击
    String ON_DOUBLE_CLICK = "doubleClick";
    //弹起
    String ON_UP = "up";
    //按下
    String ON_DOWN = "down";
    //移动
    String ON_MOVE = "move";
    //滚动
    String ON_WHEEL = "wheel";
    //悬停
    String ON_OVER = "over";
    //失焦
    String ON_BLUR = "blur";
    //获焦
    String ON_FOCUS = "focus";
}
创建 Mouse 类:
package com.gupaoedu.vip.pattern.observer.events.mouseevent;
import com.gupaoedu.vip.pattern.observer.events.core.EventLisenter;

public class Mouse extends EventLisenter {
    public void click(){
        System.out.println("调用单击方法");
        this.trigger(MouseEventType.ON_CLICK);
    }
    public void doubleClick(){
        System.out.println("调用双击方法");
        this.trigger(MouseEventType.ON_DOUBLE_CLICK);
    }
    public void up(){
        System.out.println("调用弹起方法");
        this.trigger(MouseEventType.ON_UP);
    }
    public void down(){
        System.out.println("调用按下方法");
        this.trigger(MouseEventType.ON_DOWN);
    }
    public void move(){
        System.out.println("调用移动方法");
        this.trigger(MouseEventType.ON_MOVE);
    }
    public void wheel(){
        System.out.println("调用滚动方法");
        this.trigger(MouseEventType.ON_WHEEL);
    }
    public void over(){
        System.out.println("调用悬停方法");
        this.trigger(MouseEventType.ON_OVER);
    }
    public void blur(){
        System.out.println("调用获焦方法");
        this.trigger(MouseEventType.ON_BLUR);
    }
    public void focus(){
        System.out.println("调用失焦方法");
        this.trigger(MouseEventType.ON_FOCUS);
    }
}
创建回调方法 MouseEventCallback 类:
package com.gupaoedu.vip.pattern.observer.events.mouseevent;
import com.gupaoedu.vip.pattern.observer.events.core.Event;

public class MouseEventCallback {
    public void onClick(Event e){
        System.out.println("===========触发鼠标单击事件==========" + "\n" + e);
    }
    public void onDoubleClick(Event e){
        System.out.println("===========触发鼠标双击事件==========" + "\n" + e);
    }
    public void onUp(Event e){
        System.out.println("===========触发鼠标弹起事件==========" + "\n" + e);
    }
    public void onDown(Event e){
        System.out.println("===========触发鼠标按下事件==========" + "\n" + e);
    }
    public void onMove(Event e){
        System.out.println("===========触发鼠标移动事件==========" + "\n" + e);
    }
    public void onWheel(Event e){
        System.out.println("===========触发鼠标滚动事件==========" + "\n" + e);
    }
    public void onOver(Event e){
        System.out.println("===========触发鼠标悬停事件==========" + "\n" + e);
    }
    public void onBlur(Event e){
        System.out.println("===========触发鼠标失焦事件==========" + "\n" + e);
    }
    public void onFocus(Event e){
        System.out.println("===========触发鼠标获焦事件==========" + "\n" + e);
    }
}
客户端测试代码:
package com.gupaoedu.vip.pattern.observer.events;
import com.gupaoedu.vip.pattern.observer.events.mouseevent.Mouse;
import com.gupaoedu.vip.pattern.observer.events.mouseevent.MouseEventCallback;
import com.gupaoedu.vip.pattern.observer.events.mouseevent.MouseEventType;

public class MouseEventTest {
    public static void main(String[] args) {
        try {
            MouseEventCallback callback = new MouseEventCallback();
            //注册事件
            Mouse mouse = new Mouse();
            mouse.addLisenter(MouseEventType.ON_CLICK, callback);
            mouse.addLisenter(MouseEventType.ON_MOVE, callback);
            mouse.addLisenter(MouseEventType.ON_WHEEL, callback);
            mouse.addLisenter(MouseEventType.ON_OVER, callback);
            //调用方法
            mouse.click();
            //失焦事件
            mouse.blur();
        }catch(Exception e){
            e.printStackTrace();
        }
    }
}
观察者模式在源码中的应用
来看一下 Spring 中的 ContextLoaderListener 实现了 ServletContextListener 接口,ServletContextListener 接口又继承了 EventListener,在 JDK 中 EventListener 有非常广泛的应用。我们可以看一下源代码,
ContextLoaderListener:
package org.springframework.web.context;
import javax.servlet.ServletContextEvent;
import javax.servlet.ServletContextListener;
public class ContextLoaderListener extends ContextLoader implements ServletContextListener {
    public ContextLoaderListener() {
    }
    public ContextLoaderListener(WebApplicationContext context) {
        super(context);
    }
    public void contextInitialized(ServletContextEvent event) {
        this.initWebApplicationContext(event.getServletContext());
    }
    public void contextDestroyed(ServletContextEvent event) {
        this.closeWebApplicationContext(event.getServletContext());
        ContextCleanupListener.cleanupAttributes(event.getServletContext());
    }
}
ServletContextListener:
package javax.servlet;
import java.util.EventListener;
public interface ServletContextListener extends EventListener {
    public void contextInitialized(ServletContextEvent sce);
    public void contextDestroyed(ServletContextEvent sce);
}
EventListener:
package java.util;
public interface EventListener {
}
基于 Guava API 轻松落地观察者模式
在这里,我还推荐给大家一个实现观察者模式非常好用的框架。API 使用也非常简单,举个例子,先引入 maven 依赖包:
<dependency>
    <groupId>com.google.guava</groupId>
    <artifactId>guava</artifactId>
    <version>20.0</version>
</dependency>
创建侦听事件 GuavaEvent:
package com.gupaoedu.vip.pattern.observer.guava;
import com.google.common.eventbus.Subscribe;

public class GuavaEvent {
    @Subscribe
    public void subscribe(String str){
        //业务逻辑
        System.out.println("执行 subscribe方法,传入的参数是:" + str);
    }
}
客户端测试代码:
package com.gupaoedu.vip.pattern.observer.guava;
import com.google.common.eventbus.EventBus;

public class GuavaEventTest {
    public static void main(String[] args) {

        EventBus eventbus = new EventBus();
        GuavaEvent guavaEvent = new GuavaEvent();
        eventbus.register(guavaEvent);
        eventbus.post("Tom");
    }
}
观察者模式的优缺点
优点:
1、观察者和被观察者之间建立了一个抽象的耦合。
2、观察者模式支持广播通信。
缺点:
1、观察者之间有过多的细节依赖、提高时间消耗及程序的复杂度。
2、使用要得当,要避免循环调用。